

How To Make A Camera Stabelizer
DISCLOSURE: AS AN AMAZON ASSOCIATE I EARN FROM QUALIFYING PURCHASES.
THIS Mail service MAY Comprise Chapter LINKS, MEANING, AT NO Boosted COST TO You lot, I EARN FROM QUALIFYING PURCHASES. Chapter LINKS ARE MARKED WITH #advertizement . "I" IN THIS CASE Ways THE OWNER OF FILMDAFT.COM. Delight READ THE Total DISCLOSURE FOR More INFO.
This calendar week, I opened the body of my machine to observe an onetime (and I hateful old) steadi-cam rig I made out of PVC piping and duct record dorsum when I was in high school. I suppose I had been carrying information technology effectually for some time out of a light-headed combination of nostalgia and… perceived future necessity…?
Which got me thinking: was I ever going to actually apply this near fifteen-twelvemonth-old rig, rig being generous as I doubt it fifty-fifty works anymore, to stabilize a camera on an actual shot? Instead, what other affordable, DIY options are available to me now, in 2019, for stabilizing a photographic camera on a upkeep?
So I did the smart thing and finally did some research. This is what I found:
The top 7 affordable DIY ways I found to stabilize your camera on a budget, in gild from simplest to most complicated, were: 1) making use of a uncomplicated and cheap tripod to tilt, pan, or monopod a DSLR camera, 2) tying strings, rubber bands, or camera straps to your photographic camera and anchor with your trunk weight to stabilize handheld pans and tilts, three) making a glidecam out of an quondam gift handbag iv) using wheelchairs, skateboards, or "magic carpet" dollies for tracking shots, five) creating a PVC pipe rig that actually works in 2019, vi) using metal instead of PVC for a sturdier DIY rig, and seven) doing some fabricating at habitation using carbon fiber and some electronic components to create your ain DIY Gimbal!
And that'southward merely a bird's eye view of all the tricks and tools y'all can utilise to stabilize your cine-work with a DIY mindset.
If you're not interested in a DIY solution have a look at our amazing guide to the all-time gimbals for DSLR and mirrorless cameras instead.
Let'south take a expect at each of the prescribed methods in more detail below. But start:
What is Camera Stabilization?
Let's talk about camera stabilization for a moment. When we talk about camera stabilization, what we are talking almost is the creation of a smooth, stable prototype.
We often recall of stabilization as solely referring to the opposite of "shaky cam", but stabilization isn't just almost shine sailing when going handheld. A tripod is a perfect example of hands-complimentary camera stabilization.
I know that's a very basic observation, but it's worth pointing out because in my research I found that the method of stabilization that's all-time for yous is largely dependent on what type of shot y'all are trying to create.
For case, when you call up of stabilization, your first thought might go to a gimbal or glidecam rig, and you might skip over a tripod or a slider. In reality, anything that supports your photographic camera's weight and creates a steady paradigm can be a stabilizer. Even a scrap of resistance to keep your artillery steady can count equally stabilization.
In that location are more reasons than a complex 8-infinitesimal handheld one shot that you lot could use assist stabilizing an image. You might need a stabilizer when panning or tilting, or maybe you need to stabilize an image while tracking or dollying. Yous might just need a steady solution for shooting handheld in a compression. I've got all of those covered.
With that in heed, here are my top seven picks for the best, almost affordable, nearly DIY methods for stabilizing your photographic camera on a budget.
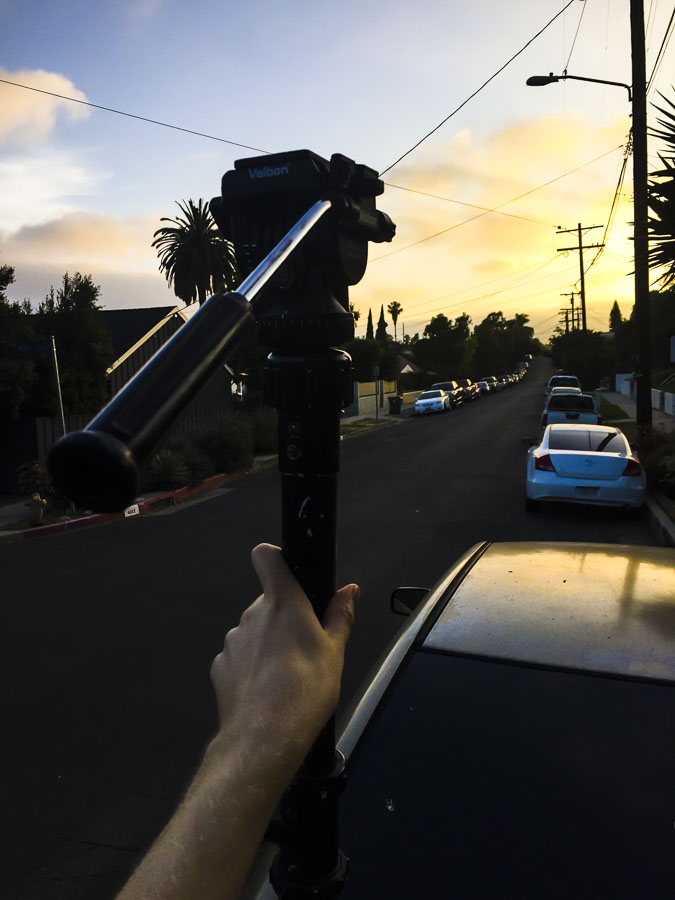
Method 1: The Versatile Tripod
Tripods are so much more than just a manner to firmly residuum your photographic camera on.
In fact, a tripod can be used for several other types of stabilization equally well – from glidecams to shoulder rigs and snorricams.
Permit'south commencement by taking a look at how you lot can utilise your tripod as a steadicam.
Below is a video from Motion picture Riot where y'all can run into this technique in apply together with other cool tricks, e.1000., how yous can use your tripod as a snorricam:
To exercise this method, begin by connecting your photographic camera to the tripod. Y'all will want to concur the tripod by the middle bar, non one of the iii legs. By doing this, you can use the iii legs as counterweights, which will steady your shot.
If you desire to create a tilt, you can by extending the first two legs extended all the mode to the ground, and using the third to tilt the camera forward and astern.
You can similarly utilise the tripod to create a crane effect by lowering or raising the eye tripod with the hand-crank. This works all-time for shots with a subject close in the front of the frame to focus on as y'all accept information technology in.
Just brand sure you lot crank slowly to go on information technology smooth. Y'all can ever speed it upward in post. (Obviously, this works improve with cheap tripods, only cheaper tripods are not always as smooth).
If you're looking for an cheap tripod for video – or an expensive one for that matter – have a await at our guide 10 Best DSLR Video Tripods for beginners, travel, and pros.
But there are other ways to employ your tripod as a Steadicam, as yous can run across presented hither past YouTuber Will Merrel:
"The Merricam" is a actually inexpensive mode to use a tripod as a steadicam or glidecam, as you can just buy an cheap tripod and alter information technology for these kinds of shots.
Keep in heed, that the heavier the tripod, the more stable your shots are going to be.
Also, if you find the legs of the tripods doesn't way plenty to counter-residuum the weight of your camera, you tin just add together a calorie-free stand up sandbag or some of those fitness weight-belts you lot wrap around your angles to the legs of the tripod.
And finally here's a way to quickly plow your tripod into a shoulder-rig as presented by Eric Rossi:
If yous adopt, you lot could fifty-fifty wrap some plumbing pibe insulation – or simply your jacket – around the leg which goes over your shoulder for a quick DIY shoulderpad.
Method 2: Straps, Strings, and Other Things
Thank you to a helpful video I institute from Filmora, I discovered quite a few useful methods for stabilizing your camera with only but a camera strap.
Similar the to a higher place method, these methods are all-time for DSLR cameras as well. I call up it's rubber to presume that if you are on a upkeep and you lot are shooting a project without renting a Steadicam rig, you are probably shooting on DSLR.
One of the get-go methods I found interesting was using a five to 7-foot piece of string that you screw betwixt your camera and a tripod baseplate.
You brainstorm past belongings the two ends of the string together above your caput in front of you, then step forwards onto the cord, using your feet to carve up the centre to form a triangle, which will act as a base.
Yous then line the ii ends of the string together and lay them against the bottom of your camera. Spiral in the baseplate so y'all are sandwiching the string between the camera and the plate until it's taught, and then adjust your feet until you are holding the camera at the height yous will exist most comfortable with holding it while you pan or tilt.
Your feet forming a base, you should exist holding your camera plenty abroad from y'all so the string is tight, creating resistance, and stabilizing your movements. By creating this resistance against your bodyweight, your movements should be much smoother.
A similar method to the cord play a joke on above that you can use on the go is to employ a rubber ring that you tie against your belt loop. Using a rubber band gives you more flexibility while withal keeping the connectedness taught while tying information technology to your chugalug loop makes you mobile in a way the string method can't.
Here'south what you do. Yous first attached the safety ring to your belt, and tie it and so that information technology's nice and tight. Make certain the rubber band is new and not an older ane that's been sitting in your cabinet for years, equally old rubber bands will hands break on you.
Attach the finish of the condom ring that isn't tied to your belt loop to the camera using the base of operations-plate to anchor information technology in place.
From there, you can concord your camera at arm'southward length from you and employ the rubber band to help stabilize the epitome as you pan or tilt, as long as you proceed the resistance taught.
The terminal option I institute interesting, is that you can use your camera strap for resistance in a similar way every bit the higher up.
You lot start by putting your DSLR camera's strap around your neck and property your photographic camera at a far plenty distance from your face that the strap becomes taught. Pulling it tightly against your neck in this way, your photographic camera will apply your own body weight as a stabilizer, which volition create a smoother look equally you pan the photographic camera from left to correct.
To make this piece of work, you'll desire to move slow enough and use enough resistance so the strap doesn't loosen, or it'll all basically be for cypher. If you're in a pinch, this is a neat trick that volition at least assist to practise something to reduce the shaky expect in a handheld shoot.
Method 3: Glidecam in a Bag
Some other notice courtesy of Filmora, this method is useful for when you have gift numberless lying around from before you lot were a broke filmmaker and could actually go shopping for gifts. Become thrifty past turning an old gift bag into a brand-shift glidecam rig!
Here'southward what you do: Brainstorm by selecting a gift bag that'due south big plenty to fit your camera (nigh likely a DSLR) with in-tact handles that will be able to support the weight of your camera without breaking.
Next, consider the size of the lens you lot will be shooting on, and cutting a wide-plenty hole to let y'all to shoot through in the side of the bag.
Place your photographic camera in the bottom of the purse so that the lens is pointing through the hole, and voilà! You have a makeshift glidecam that you can carry for shine tracking of a bailiwick.
Go along in mind, this method is best for low-lying tracking shots, similar following feet or a character at a distance from a lower vantage point. Y'all can carry the bag so it's at centre level by holding the bag with your artillery in a higher place your head, just that will become tiring fast, then I wouldn't recommend it. Instead, attempt…
Method four: Skateboards, Wheelchairs, and "Magic Carpet" Dollies
Dollies, dolly rails, cranes and jibs are some of the priciest production tools to rent and are time-consuming to set up. On a budget, in that location are some uncomplicated (and fun) alternatives you can consider.
For example, one of the first-always proficient dolly substitutes I discovered as a young film student was a wheelchair. We were lucky in that one of my frequent collaborators had an old wheelchair around the house, and we were able to use that on a lot of our earliest films together.
When using a wheelchair, yous can operate the photographic camera while sitting in the wheelchair, or put the camera on a tripod and get out and button the wheelchair dolly yourself.
The trick with using a wheelchair to stabilize your tracking shots is that a wheelchair is simply as shine as the footing below information technology and whoever is pushing the chair, but it's far superior to something like an office chair, with unreliable wheels that like to jut off in different directions than the i y'all're going in and have virtually no shock-resistance.
Simply wheelchairs aren't your only option. You may accept tried this before, but skateboards tin can make for a decent dolly replacement too. Longboards or boards with bigger wheels are safer bets, and you lot'll only desire to utilize them for brusque distances along hard, flat surfaces.
For soft surfaces, like interior carpets, you can utilize the "magic rug" dolly technique by sliding your camera along the ground with a big piece of paper-thin.
Sliding your camera (on a tripod) with paper-thin is a surprisingly smooth ride, and works very finer, particularly if you lot tin can rig information technology with some type of handle to button it while standing upwardly.
If you don't have a slice of paper-thin, you tin fifty-fifty use some coffee cups, skateboards, and fifty-fifty a pot from the kitchen, like in this video from Filmora:
You tin can likewise utilise smaller pieces of cardboard to slide your camera on hard surfaces, similar a kitchen table or nearby counter-top. This method doesn't require a tripod – only your DSLR photographic camera sitting on the paper-thin.
The magic carpeting method doesn't have to just be paper-thin. You can use a cut of cloth to place under your photographic camera to then slide along a hard surface like a tabular array or countertop. As long as you become slowly, this will smoothen the shot and add a nice parallax mode slider effect to your shots.
Have a expect at trick number 2 and three in this video by Hayden Pedersen, where he uses a towel as a slider and a desk chair every bit a dolly:
Now for the slightly more complicated solutions…
Method 5: Build Your Own PVC Pipe Steadicam Rig
All correct, I couldn't resist including this one in here. Building rigs out of PVC pipage is how I first learned how to DIY my own steadicam rig, and thanks to some creative designers, they are nevertheless a viable DIY option for stabilizing your shots this day in age.
However, my rig is definitely obsolete, so I wanted to research the type of rig would someone want to build if they did desire to make their own steadicam out of PVC pipage.
I found this video, called the $13 DIY Camera Stabilizer by Collin McDowell:
In it, Collin shows how to use PVC and some counterweights to create a monopod-fashion rig with two smaller PVC arms as handles, which you can reverse 90 degrees to transform the rig into a shoulder-rig or to exist held for low-angle glide-cam way shots.
Information technology's pretty easy to assemble, and you lot can't shell the cost. All you need are three ¾ inch PVC caps and elbows, a ¾ inch PVC cantankerous, ii ¾ inch PVC pipes for the arms and center leg, and a half inch PVC pipage that will go up the heart for the caput, where yous will mountain the tripod head (which yous can get from a cheap tripod on Amazon or Best Buy). Other than that you just need a ¾ inch metal nipple and two 2.5 lb dumbbell weights for the counterweight.
Because it'due south pretty simple and doesn't crave also many materials to put together, I institute it's the cheapest and easiest of the "build your own" rigs I uncovered in my inquiry.
There are a few other PVC pipage rigs you tin create if you feel y'all desire to up your PVC game, like this double shoulder rig from Film Riot which feels similar a spiritual successor to the $thirteen 1 from Collin McDowell:
And last the PVC Fig Rig by Media Unlocked which is a more handheld, circular PVC rig that stabilizes the photographic camera in the middle of the rig so you have more mobility as more of a glidecam kind of state of affairs:
Then there'south…
Method 6: Build Your Own DIY Metal Stabilizer
The best version of metal, non-PVC pipe DIY stabilizer was this one, called the Silverish Flyer steadicam. Its curved pattern reminds me of a more professional Merlin Steadicam rig, minus the rotating handlebar, but what it lacks in "buoyancy" it makes upwardly for in functionality.
Considering it is made of metal pipes as opposed to PVC, plan on this rig beingness heavier to operate. I constitute the video was helpful and like shooting fish in a barrel to follow, so for all the details on how to build this stabilizer, become ahead and watch that video to larn the components you need and how to get together information technology.
Also, because information technology's metallic and non PVC, you may feel a piddling more comfortable bringing this to a professional person shoot than a more amateur looking PVC rig.
If you lot're looking to stay in the metal stabilizer territory but desire to create one with a more basic design, y'all can cheque out this video from Youtuber I Similar to Make Stuff:
In the video, he uses a few pieces of ¾ inch steel pipage and a cross connector along with some ends, bolts, and nuts, and some PVC that he cuts upwards and duct-tapes together to turn into a hand grip.
Most interestingly, for a weigh, he uses a flange, which he and so screws a block of woods onto and then that he tin can arrange the weight by adding a brick (yes, a brick) for a counterweight.
Very strange option to me, only information technology'south creative and seemingly practiced in a compression, peculiarly if y'all are going to be using different weighted cameras… and accept bricks lying around somewhere. I might create 1 using all of the chopped firewood in the front of my Southern California home we never use (because we're always on burn).
And finally…
Method vii: Build Your Own DIY Gimbal
Definitely, the about complicated rig to create from scratch, only if you just must take a gimbal stabilizer for your DIY film shoot, this is the right method for y'all.
This method requires some metal fabrication and 3D printing, so it'south not for the faint of heart or those agape of picking up some new technical know-how.
If yous recollect it's a projection y'all can tackle, all the steps and materials are laid out simply in this tutorial on Instructables thanks to a user chosen Thehydoctor.
Using carbon fiber tubes and sheets, some brushless motors, a lithium-ion battery, and a controller board, information technology is possible to actually create your own two-axis brushless DSLR Gimbal camera stabilizer. You can even mount a monitor on the rig, too.
Bank check out the final product in this video hither:
Stabilizing On a Budget
Across all of those DIY methods, there are plenty of cheaper knock-off versions of pop stabilizers on the market y'all tin can attempt. I say that with the caveat that the pop versions are popular for a reason – they piece of work. DIY options are a skillful alternative to shelling out a piffling money now for a weak investment.
Instead, why non build a temporary solution yourself so you tin can save your coin until you can buy your ain professional rig in one case the money is coming in.
Subsequently all, the benefits are two-fold: y'all principal the fine art of stabilization by learning the core concepts through trial and error, weight and counter-weight, so when you can afford the pro versions, you actually understand what you're doing.
At the terminate of the day, with how complicated all the reprogramming and rebalancing can be on some of these high tech rigs, even when swapping out a lens, sometimes the simplest solution is the all-time solution.

Grant Harvey is a freelance writer, screenwriter, and filmmaker based out of Los Angeles. When he'southward not working on his own characteristic-length screenplays and television pilots, Grant uses his passion and feel in film and videography to assist others learn the tools, strategies, and equipment needed to create loftier-quality videos as a filmmaker of any skill level.
Source: https://filmdaft.com/affordable-diy-ways-to-stabilize-your-camera-on-a-budget/
Posted by: morleyquatere.blogspot.com
0 Response to "How To Make A Camera Stabelizer"
Post a Comment